Sunday, February 20, 2011

Good etiquette for the modern blogger week


Good etiquette for the modern blogger week
Originally uploaded by Flutter from.Kat (Mummastimetocreate)

Kat has put together a great series of posts about etiquette for the Modern Blogger. Go check it out at www.mummastimetocreate.blogspot.com!

I spend much time living in fear of accidentally annoying/copying/offending my fellow craft bloggers. These posts help illustrate that we are all regular people who mostly want to contribute to a positive, active craft community online. I am so thankful for this community! Thankful as well to Kat for putting this together.

Go check it out!
Chris

Friday, February 18, 2011

Shhhh... Sherbet Pips is my HomeGirl

Ok, I'll come clean.  One of the reasons I haven't been making great progress on my February Finish projects is this:

Ok, ok, wipe up the drool.  Don't embarass yourself like that.  A little dignity please!

I'm cookin' up a little (BIG) recipe for you folks.  I have a few exciting things in the works right now so stay tuned!

(Don't forget to sign up as a Follower) ---->

Have a great weekend!

Chris

Monday, February 14, 2011

Lying Down On The Job


Lying Down On The Job
Originally uploaded by Frecklemama

I did NOT make my Week #2 deadline in my February Finish Challenge.

I did finish the Michael Miller top and basted the 3 Sisters Glace' quilt. I also started quilting the Glace' quilt and made a Sherbet Pips zipper pouch.

I also spent a good chunk of time on Sunday getting to know the Atlanta Modern Quilt Guild. Yay!!

Chris

Mug Rug Sent!


Mug Rug Swap Package being sent!
Originally uploaded by Frecklemama

I am so excited to send this out today in my first Flickr Swap ever. I loved making this for my partner. I also wanted to share some of my favorite scraps including a Sherbet Pip puppy and some of that great Alexander Henry rooster fabric from my Market Bag project.

Of course, I had to throw in some Valentine candy and a little chocolate picked up at Ikea on Saturday.

I have two of these Wonky Star blocks left over so I am thinking about making them into Pincushions. Oh, and I've joined the Pincushion Swap on Flickr Too. Can't wait to start on my ideas for that!

Hope you all have a great Valentine's day filled with love.

Saturday, February 12, 2011

Tutorial: How To Make Quilting Practice Squares

After I quilt and attach binding to the front of the quilt, I trim off my excess batting and backing.  This usually leaves a 4-inch column of "waste" that I hate to waste.  Any large piece of backing fabric will be folded and returned to my stash, but some of the smaller sections get trimmed and made into practice quilting squares.  I thought I'd show this process to you in case you want to do the same.

First, trim your excess off:

Next, clean off any stray threads and straighten your column.  Fold over sections about 6" long.  Note: this will produce double batting.  In my case, I've been experimenting with double batting quilts.  If you'd rather practice with single batting, trim out the batting so that your squares only have one layer of batting in them.
Zip your rotary cutter across, fold another section, and repeat.  This doesn't have to be precise at all!  Just let 'er rip!

Repeat until the column is cut up into sections.  You probably don't want to do this with ALL sides of your quilt trimmings.  I usually just use one side and stash the rest of my trimmings (or throw away if they're tiny).

Take your stack of folded pieces to your machine and chain stitch them across the open ends.  We're not going to stitch down the sides, just the ends.  This is a quickie thing.  No worries about accurate seam allowances or anything.

For those of you unfamiliar with "chain stitching", it means sewing one section after another without stopping, cutting thread, restarting, etc.  Here is a easy way to see what I'm talking about:

Voila!  You now have a nice little stack of practice squares for quilting.  Whenever I start quilting a project, I always start on a practice square to test my tension, get used to free-motion movement again, and remind my machine what it's supposed to be doing :-)

Once you have a healthy stack of practice quilting squares, you can venture into some quilting experiments.  For inspiration, check out Leah Day's Free Motion Quilting project at http://www.daystyledesigns.com/.  She has hundreds of quilting patterns and video demos of how she tries new things.

Happy Quilting!

Chris 

Friday, February 11, 2011

Basting Bastard

First off, let me update my February Finish Challenge for Week #2.

I finished the Michael Miller Funky Christmas top (otherwise known as the Old Red Barn Co Quilt-Along quilt).  Don't you love my quilt names?  Do you stand in awe at the creativity?  Gah!

I selected this quilt for my Week #2 finish because it is one of the oldest WIPs in my stack.  Once I finished the top, however, I realized I didn't have enough backing fabric.  For some reason I only purchased 2 yards when I needed 4.  So I'm off to the fabric store today to figure something out.  Am thinking about backing it with flannel.  Mmmmm...

Meanwhile, in an effort not to lose momentum, I basted another quilt top.  This one is my Glace' quilt.  It is kind of small but I love it.  These fabrics feel incredible.  I love, love love Moda's 3 Sisters fabrics.

The top was already finished and the backing was already pieced together (wahoo!) so I just needed to do the super-fun part of spending time on my hands and knees on a wooden floor poking myself with the pins.  Luckily I had my usual ever-helpful basting assistant:


You would think that quilt fabric had cat nip in it!  There is something about a basting-in-progress that gets Jax very excited.  He wants to stretch out on it.  Roll around on the fuzzy batting.  Eat the pins!  Or at least pick them out of the box and toy with them.  So I spend as much time managing him as I do actually pinning the quilt sandwich together.  High-maintenance but very sweet.

So the Glace quilt is now basted and ready to be quilted.  The Michael Miller top is done and ready to be backed and basted.

And my Joann coupons are next to my car keys and ready to be used.  You know you're in trouble when you have to make an actual shopping list for Joann's!  Green ric rac, cream and white zippers, hot pink embroidery thread, 4 yds backing fabric, Dresden Plate template if cheap enough, skinny pins to replace bent ones, etc etc.  Living out in the boonies means I have to save up my list until it's worth the 40 minute drive.

Happy Friday everyone!
Chris

Monday, February 7, 2011

February Finish - Week #1 DONE!

Fig Tree Fresh Cottons Quilt

I finished this about 5 minutes before midnight last night.  Just made it under the wire!

I am going to wash and dry this today before taking some better pictures.  I will post them as soon as I get them snapped and uploaded.

I stitched the last of the binding during the Super Bowl.  Of course, I had to look up when the commercials were on ;-)

This quilt was made with two layers of batting so it is very substantial and heavy.  I love it so far and can't wait to see how it comes out of the dryer!

I am working on a big Moda Bake Shop project that is going to take a bit of my time in the next couple of weeks so my next February Finish week is going to be challenging!  I think I'm going to tackle the Michael Miller Christmas Quilt next.  It needs sashing, basting, quilting, binding.  So there is quite a bit of work left in it!  Right now it looks like this:

Design wall

This quilt is part of the original Old Red Barn Co Quilt Along.  Why, yes, I do mean the one that started in 2009!  It's one of the most simple patterns too (Rail Fence) but when you make anything in holiday fabric, it becomes very difficult to work on when that holiday is nowhere near.  I need to get this WIP monkey off my back asap.  So that's what's coming up this week.  Stay tuned for updates!

Saturday, February 5, 2011

Love X3 - My Three Reasons

I have a personalized plate on my minivan.  Sexy, I know.  If you're wondering what life is like with three kids and a minivan, I suggest you watch this:  Mom My Ride

When I just had the two boys, my plate said MY BOYS.  I daydreamed about the day I would have a girl and need to change it.  Well, my dreams came true and I had to change it.  So I changed it to LOVE X3.  Love times three.  My heart is overflowing with love for these three characters.  They are funny, smart, unruly, cuddly, creative, athletic and just plain lovely.  I could go on and on.

I just wanted to record some snapshots of where they are in their lives right now.  At 8, 6 and 3.5, they are loud, funny, active and demanding.  Yet they are all becoming more independant, curious, kind and engaged with the world around them. 


I am thankful every day for these three wonderful creatures.  They fill my house with screams laughter, farts joy, and fights love.

It is true what they say:  time flies when you're having fun.  :-)

Friday, February 4, 2011

Basting and Quilting Fig Tree Fresh Cottons Quilt

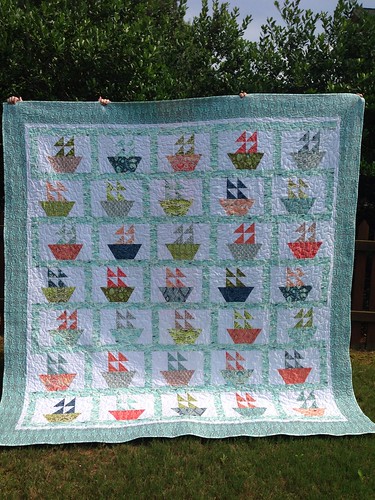
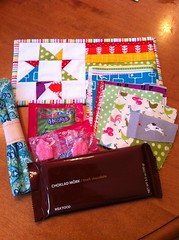
My first target of the February Finish challenge is my Fig Tree Cherry Delight Quilt made with the Fresh Cottons line.  I bought this as a kit.  I love anything Fig Tree and putting this quilt together has been a breeze.  Instead of adding cherries to the center block, I added circles and a flower.  So it's more of a Fresh Cottons quilt than a Cherry Delight Quilt in my case.  Or maybe a Flowers Delight.

In this case, the top and back were already pieced and ready to go.  I needed to start this week by basting it.  Ugh, I hate basting.  Luckily, I have a nice, big area of bare hardwood floor in my foyer that works very well for basting.  It's well lit by natural light, there is no furniture to move, and I can easily move around all four sides.  Also, we don't use the front door that much so it isn't an area of heavy traffic.

First I use painter's tape to tape down the backing:
Please notice that I blatantly break the quilt police rule of trimming off the selvage edge when piecing the backing.  I don't do it.  And so far in making, washing and using qulits, I haven't noticed a difference.  Please feel free to chime in here and give me some good reasons to change my routine.  I'm open to criticism.
I guess one reason would be to have all of that lovely selvage to make selvage projects with! 

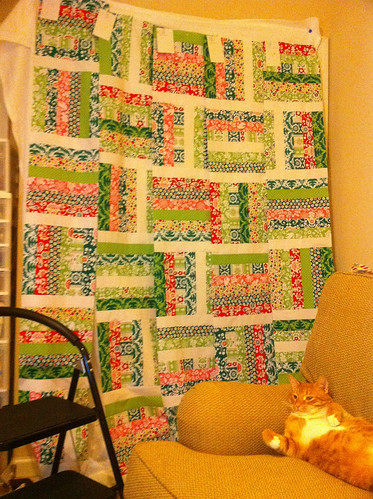
For this quilt I decided to try double layers of batting.  I'm not entirely pleased with how thin my quilts are.  I use Warm & White cotton batting.  I like it and it's very easy to use.  I just wish the quilts were a little more substantial.  Heavier and thicker but not poofy like with a high-loft polyester batting.  I would love any input about how to achieve these results.  I've looked around online and someone recommended just doubling up the batting.  So here goes.  After carefully laying and smoothing out the two layers of Warm & White, I add the quilt top:

Yes, the sides are a bit wobbly.  I'm ok with that.  I can always square it off before binding.

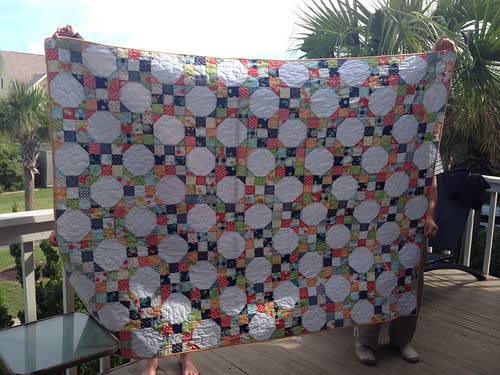
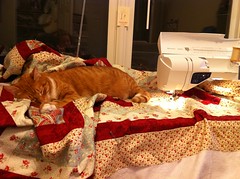
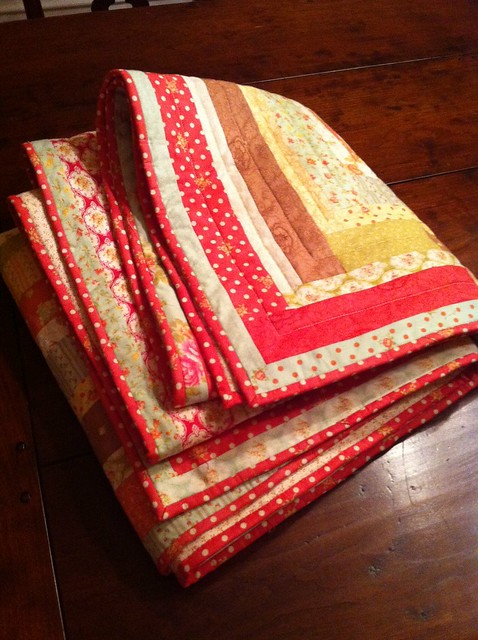
Next I take it to the machine for quilting.  Because I want this quilt DONE, I choose a very simple quilting plan of quilting down the center of each strip.  This will form concentric squares on the quilt back which will mimic the design on the front.
I just eyeball the center and let er rip.  I'm using the walking foot and my machine's needle down feature.  When I get to the point of needing to make my 90 degree turn, I just stop, pivot, and continue.  Easy peasy.  I'm using a Shmetz quilting needle and Connecting Threads thread in a nice light peach color.  I really like the way this thread looks in the finished quilting stitch.  It looks cottony, if that makes sense.  And it doesn't end up looking too thin like piecing thread or embroidery thread. 

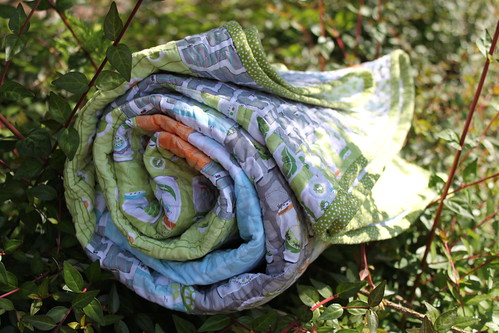
After an evening of finishing up the quilting, I unfurl the quilt to admire my work and see at little mistake.  See post below for that story.  Next steps, binding, washing and photographing finished quilt.  Only two days left to get this one finished for the February Finish Challenge!

Late Night Quilting Fail

Many of you secretly enjoy seeing the dirty underbelly of real life quilting.  Yes, it's nice to see those blogs where everything is pristine and perfect, but then there is real life. 

Late last night I was quilting away on my Fig Tree quilt (this week's February Finish WIP).  Easy, straight line quilting with the walking foot.  So easy, I could just watch a little American Idol while I'm doing it.  Man, that Steven Tyler sure is a pleasant surprise this season isn't he?  Ooooh, that girl can sing.  Gee, that weirdo sure is weird.  You get the idea.  One part quilting, ten parts watching TV.

After I finished, I unfurled the quilt to admire my nice symmetrical quilting lines on the quilt back and found this:
Wait, what?  What the heck is that?
That is the sample Cathedral Windows block I made in my Atlanta Modern Quilt Guild class on Sunday. (Because I know you're wondering, the fabric in the window is Dena Designs Tea Garden.)  It must have gotten underneath my quilt while I was quilting.  It waves to me snidely like a little Fail Flag. 

So I went to bed.  I know better than to pick up the seam ripper in anger.  I didn't want to have to write a post about Seam Ripper Fail too...

Tuesday, February 1, 2011

My Mom

This picture was taken Christmas morning.  I may have already shared it when I was posting pictures of the quilt I made for her.

In this picture my mom is comforting my daughter.  I don't know why the Princess has a sad face.  Maybe she was overwhelmed.  With six kids and all of that Santa loot, it was quite a scene!

I came across this picture in my computer folders this afternoon and was struck by the emotion in it and the emotion it evokes in me.

My mother lost her husband, my step-father Doug, only three days before this picture was taken.  She was exhausted and sad, bittersweet at having all of her children and grandchildren for Christmas but so overwhelmed with family and emotion, decisions and planning.

When Doug was in the hospital, we took off his wedding ring before the medicines caused his fingers to swell.  Mom slipped his ring on her own finger and has kept it on.  You can see it here on her middle finger next to her own wedding band.

When I see this picture, I see the sweet, timeless moment of inhaling a child's hair.  I spend many of these moments with this small girl every single day.  I can't get enough of her.  Seeing my mother enjoy the same thing is satisfying and comforting.  I see the thick gold band of Doug's ring and think of the fifteen years that he was in our lives.  The meals he cooked, the jokes he told, the trips he went on with us.  The love he gave my mother and the attitude he gave her in the last couple of years when he began feeling so bad.  The casual conversations he had with the people at the grocery store and the way he had of making you feel like you were the only person in the room.

I see the place that a handmade quilt takes in our homes and in our lives.  It comforts and covers.  I raced to complete this quilt for my mother so that I could leave her something to wrap around herself when I was unable to.  It was a gift of my love to her, crafted in soft cotton, peaceful colors, and a simple pattern.  There is part of me that wants to speak in the language of quilts. 

The first quilt I made was for my first unborn child.  He is sitting next to me right now at the healthy age of 8.  The second quilt I made was for my adored older sister.  It lives in the frozen Twin Cities and is a symbol of my gift of warmth and love to her so far away.  I lose count but I made a quilt for my younger sister and she uses it to cover her lap when she's writing her novels.  I get to be there in spirit while she creates those stories and follows her dreams!

So I speak in the language of quilts.  I give you a quilt as a way of saying I love you THIS MUCH. 

Extra Quilt Love for you quilters:  Angela at Fussy Cut   blogged about this similar notion and it really touched something with me.  Thanks Angela!  If you haven't checked out her blog yet, go for it.  It's gorgeous.